
Project 50/50 is coming along nicely. In Part 1 we procured the hardware. In Part 2 we checked the hardware and swapped out the hard drive. Now its time to get down to business, and get an Operating System installed.
At the outset, we decided that CrunchBang Linux would be the distribution of choice and we’ve stuck to our guns on that. There are other lightweight distributions, but for a moment we’ll discuss why CrunchBang was the obvious choice for this project.
To be sure that CrunchBang Linux would be workable, and before I purchased any hardware, I used VirtualBox to create a test environment that closely mimicked my desired hardware: 1GB ram and 1 CPU with 40% execution limit. I set up my test environment with Chrome as a browser, and then got a bit more specific with software needed for my primary purpose of setting this up as a backup computer for work. I setup the VPN, Pidgin chat software, and other various software such as Zim Wiki and Dropbox. The test environment worked great, and didn’t come close to running out of memory.
The other thing about CrunchBang is that it’s basically just a repackaging of Debian. There are many things specific about it, but underneath it all it’s just Debian. If something is available for Debian, it’s available for CrunchBang.
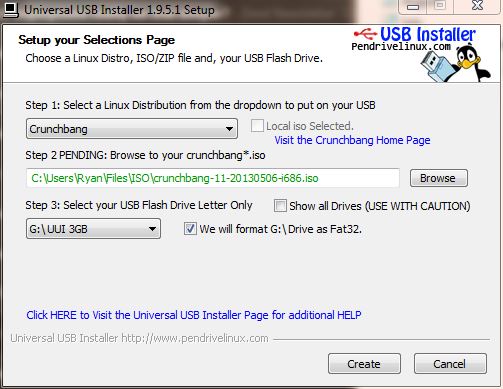
Now that I have a working installation in VirtualBox, and I have the laptop ready to go, it is time to get CrunchBang installed. First, I downloaded the CrunchBang .ISO file from Crunchbang.org. I then used the Universal USB Installer from Pendrivelinux.com to copy the .ISO file to a 4GB USB Flash Drive as seen in the image to the left.
I wonder if the Lt. Cmdr. is copy protected?
The installation itself should have been very simple but instead the next hour or so proved to be quite frustrating! I tried a different USB installer for the flash drive. I restarted the installation several times and it failed at different stages, but fail it did.
After messing with it further, I realized that I was likely dealing with a failed Flash Drive. I grabbed another one, started over, and the installation was successful on the first try and took maybe 20 minutes total.
What was truly great about the installation is that after it was successful, everything Just Worked. There were no drivers to configure. The screen resolution was correct, WiFi was detected and ready to go, and all that was left was to start configuring the system to my liking. Much of the work had already been accomplished on my VirtualBox copy of CrunchBang, and so I copied most of that over.
Here is what CrunchBang Linux looks like after installation and some minor customization:
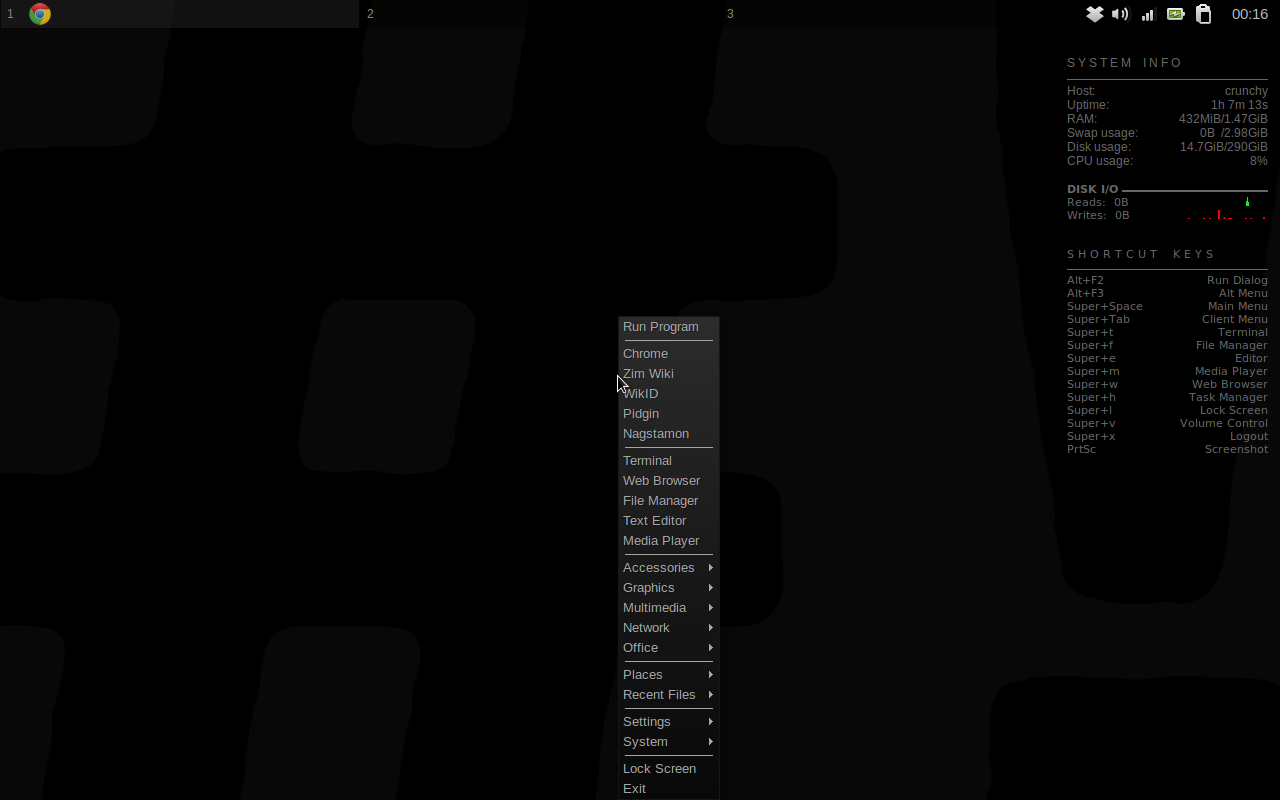
CrunchBang Linux after installation and some minor customization
In the screen shot above, you see at the top bar the three desktops that are available. It’s like having three monitors, but only being able to view one at a time. Programs can be dragged and dropped between them at will and it works quite well for keeping several programs organized. You’ll see that there is no Start-like button. The main menu is accessed by right clicking on the desktop. It’s convenient and works fine.
On the right side is Conky, a system status bar similar in function to Window’s own Sidebar. It takes up very few resources and is fully configurable. I’ve customized the one you see here so that it shows me Disk I/O. I don’t need that really, but its been cool to see. There’s nothing wrong with a little Linux bling!
One thing that strikes me about OpenBox (the window manager used by CrunchBang) is that everything is controlled via configuration files, even the main menu. Installing software does not automatically add it to the menu. An xml file must be edited. It is quite easy for someone familiar with Linux, but to a beginner it might be off-putting.
Now that CrunchBang Linux is installed, configured and is running, you’re likely wondering “How does it run?” I’ll report on that in our next installment of Project 50/50.
1 ping
[…] Project 50/50 Part 3, we installed Crunchbang Linux and got it configured. I used the laptop for a couple of weeks, […]